
Pixel Art Outline & Shading
Drawing by hand and creating pixel art are two different matters.
Pixel art is created by adding and/or repositioning pixels and/or
adjusting the colors of pixels. During this process, the pixel art
illustration is viewed at different sizes. Most of the time the
adjustments take place when the pixel art illustration is magnified and
(re)view at normal size. This process doesn't have much in common with
more traditional ways of creating artwork.
Preperation/Start
Before you start working on pixel art illustrations, take some to think
over your use of color, style, size, the program used, and so forth.
The amount of colors and type of style influences the overall look of
your artwork. Size generally influences the amount of time you have to
spend on an illustration.
Use the program you like to create pixel art. Adobe Photoshop has
numerous options, but is expensive. Microsoft Paint has a very limited amount
of options and lacks sexiness, but it's the program I prefer to make
pixel art.
The program and/or hardware used is not important, the result is.
The number of colors you use in pixel art influences the look of your final work. If you use many colors, the final work tends to look more photorealistic. If you use only a few colors, the final work will probably tend to look more graphical.
If you want to make a series of pixel art illustrations, a fixed range of
colors is a good idea.
By using the same colors again and again, you will automatically gain
consistency between the separate icons/illustrations.
Besides a fixed palette, keep an eye on contrast and overall style of
every single icon/illustration to get maximum consistency.
I use Microsoft Paint, or MS Paint, to pixelate. It is a straightforward
program and ideal for the task.
More details about MS Paint are to be found in the 'Microsoft Paint'
chapter. Besides MS Paint, there are many other more sophisticated
programs, like Adobe Photoshop, Pixen, Microangelo, Iconbuilder, Corel
Paint Shop Pro Photo, GIMP and so on...
Workflow
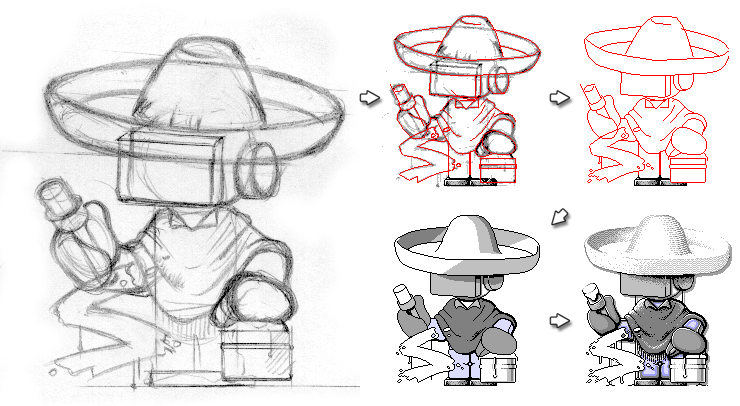
The creation of pixel art can be divided into a few steps.
- Initial Sketch Preparation
The sketch needs to be scanned - in case you made the sketch by hand - and most of the time resized to the required dimension of the pixel art illustration you want to make. - Outline
Based on the sketch, the outline is drawn first. To separate the outline of the sketch from the pixel art outline, I use the color red for maximum contrast. This red outline is colored black as soon as the outline is completely drawn. - Shading
Once the outline is right, coloring/shading is done.
Both outline and shading are important. If one of them is not right, the
result will not be ideal.
Since it has the least amount of pixels and defines the colored areas,
the outline is a good starting point. While working on the shading, the outline can, of course, still be
adjusted.
The creation of pixel art is a time-consuming activity, so make sure you
know the exact size of your final illustration. If you notice at the end
of the process that your illustration is too small or too large, you
will have a problem: scaling your work will result in distortion of the
pixel art characteristics.
More details about scaling pixel art are to be found in the
'Scaling Pixel Art' chapter.
You don't have to follow the same workflow. This a description of the way I create my pixel art.
Sketch
I like to sketch by hand on paper. Most of the time, the sketch is an
outline illustration, but in some cases shadow and/or highlights are
roughly drawn.
The sketch can be made directly on the computer as well, depending on
your hardware and/or personal taste.
In case you made your sketch by hand, you then have to scan the sketch.
The (scanned) sketch must be scaled down to the right size in Adobe
Photoshop or any other image manipulation program.
The lines may blur slightly depending on the resizing. This can be
solved by increasing the contrast so that the outline of the sketch will
become more visible and less blurred.
If you use MS Paint, you have to adjust the contrast in a program which
support this feature.
As soon as the sketch has the right size, it can be converted into a pixel art illustration.
Outline
The sketch is used as a reference for drawing the individual pixels.
The alignment and size of the pixels restricts the possibilities; you
have to cope with this restriction (or become a traditional painter).
The sketch has to be converted into pixel art. Basically, this means
that you have to redraw the sketch with pixels. This can easily be done
by tracing the outline of the sketch.
For this task, I normally use the color red; any other color is also
fine as long as the contrast with the grayish colors of the sketch is
high, so that you can easily distinguish the sketch from the pixel
outline.
If you use Adobe Photoshop, the sketch and the pixel outline are placed
in two separate layers. In MS Paint, the pixel art outline is drawn directly
over the sketch.
Once the outline is drawn and the result is good enough, the red pixels
are changed into the color of the outline; most of the time this will be
black.
If you do this solely in MS Paint, you have to spend a little bit more
time separating the outline from the sketch and adjusting the outline
color.
Personally, I prefer to draw the outline in MS Paint. Adobe Photoshop is
used to select and cut the red outline. Once the outline is separated,
the outline color is changed. The outline is then copied back into MS Paint.
The shading of the illustration can now begin.
Shading
Work from big to small; first draw big areas in your illustration and then progress to evermore detailed levels.
Depending on the amount of colors, you may be forced to use a technique
called dithering.
If the amount of colors is limited, transitions between one color and
the other can be mimicked by varying the density of pixels of both
colors. By gradually increasing the number of pixels of one color, both
colors seem to blend together.
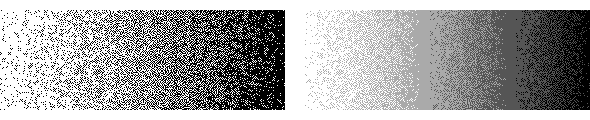
Depending on the amount of color, this transition is more or less subtle.
Dithering is explained in more detail in the 'Dithering' chapter.
To give an illustration some depth and/or contrast, you can make use of
shadows, highlights, and/or variation in lighting.
Try to figure out the virtual position(s) of the light source(s) in your
mind. This requires some spatial thinking. If 3-D thinking isn't your
strong point, take a real object and put it underneath a real light
source to see how the object is lit.
By changing the position of the light source, you can change the
mood of an illustration.
Most people experience a light source right above an object as the most
natural position.
This should of course not stop you from positioning the light source(s)
somewhere else.
Shadow
Shadow can be used to distinguish foreground and background, give the illusion of depth and/or emphasize certain areas.
Shadow comes in three flavors.
- Drop shadow
Drop shadow is used to seperate foreground and background.
By using drop shadow, an image seems to float above the page. - Cast shadow
Cast shadow occurs when light from a light source is blocked by an object.
This type of shadow has two flavors; umbra and penumbra.
Umbra (Latin for 'shadow') is the part of the shadow that is the darkest. The object which cast shadow blocks all the light. Penumbra (from the Latin paene 'almost, nearly') is the part of shadow that is slightly less dark.
The wider the light source, the bigger the penumbra.
If the light source is an infinite small point in space, cast shadow will have only one flaver: umbra. - Form shadow
Form shadow is the shadow seen on the dark side of an object self.
Examples
How to pixelate exactly - how to place the right pixel at the right
position - is very difficult to explain.
You will find two examples in this tutorial that describe the creation
of a pixel art illustration.
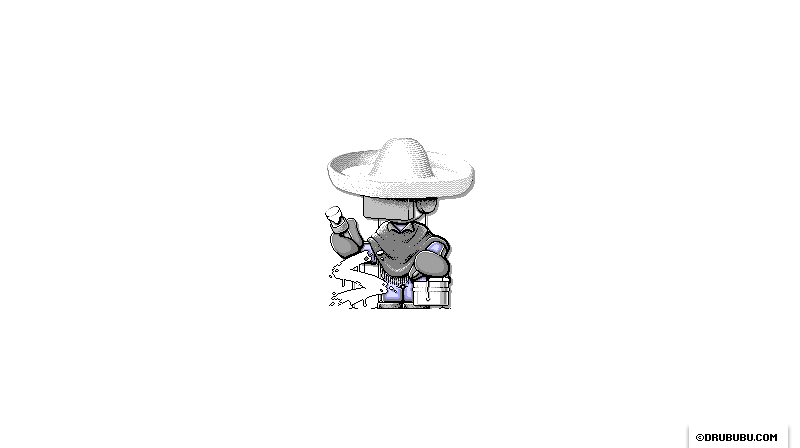
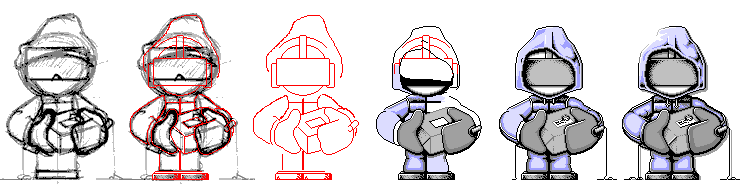
- Example One
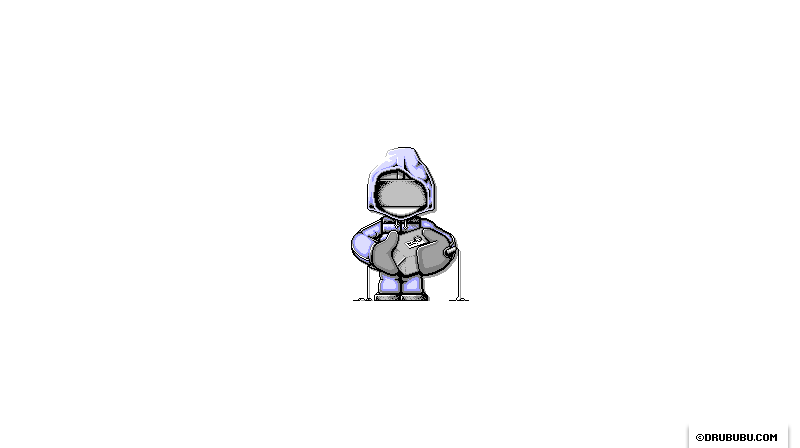
The creation of a small pixel art illustration of my nameless puppet.
view example. - Example Two
The creation process of the lighthouse keeper and how to combine the lighthouse keeper with the lighthouse.
view example.