
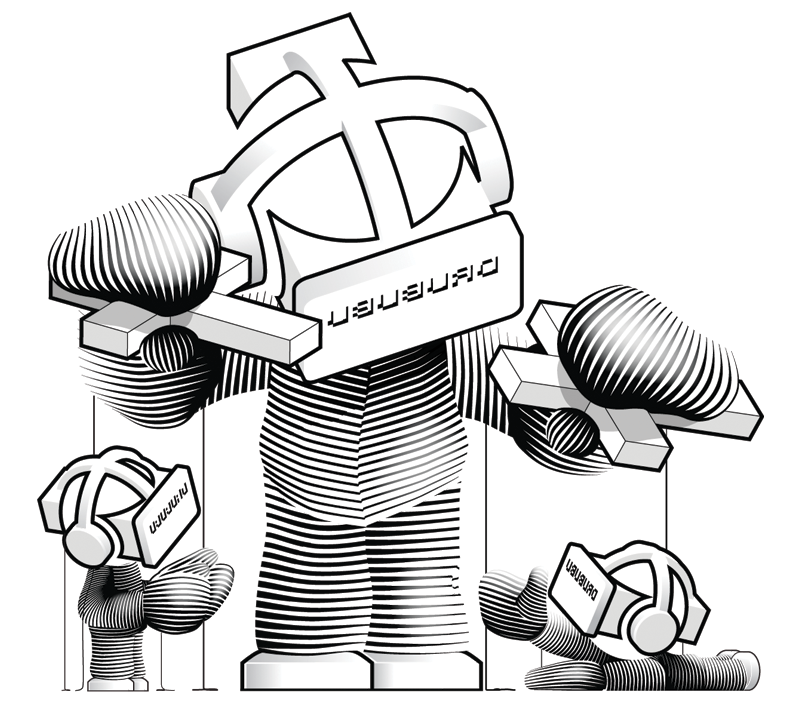
Vector Illustration 'Puppeteer'
Every illustration starts with an idea. In this case I wanted to make a detailed vector illustration of a puppeteer.
The appearance of the illustration was more or less clear; it should
resemble copper gravures, scratchboard Illustrations or a technique called hedcut; fluent, rythmic
black lines of curves.
I really like illustrations that result from this type of
techniques, so I decided to give it a try myself, just for curiosity's sake.
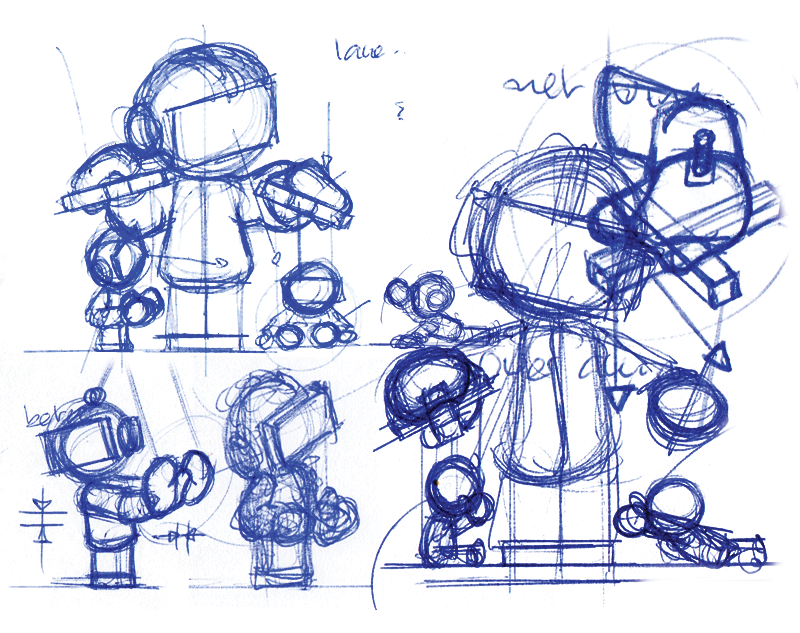
I like to sketch with a ballpoint. It leaves no room for cleaning up lines, which is ideal in this phase of the process. The sketches do not need to be highly detailed or to look like the sketches of a genius like Michelangelo. They are only used to capture the idea.
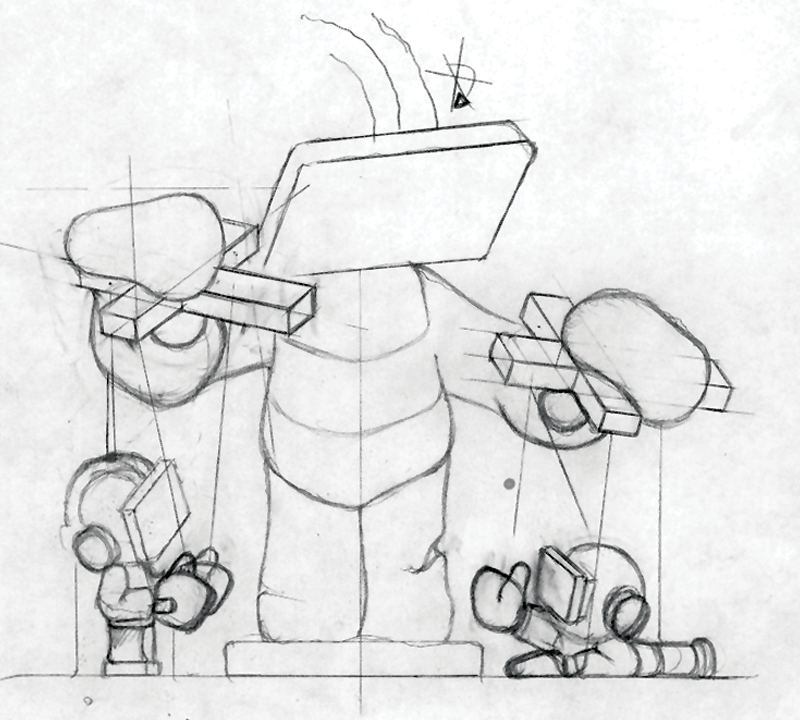
After the initial rough sketches are made, a more precise sketch is made, this time with a pencil. This gives some room for adjustments. Still not all details are drawn.
The next phase is tracing the outlines of the sketch in Adobe Illustrator.
Adobe Illustrator uses so-called bezier curves, named after the French engineer Pierre Bézier who invented the curves and used them for designing automobiles.
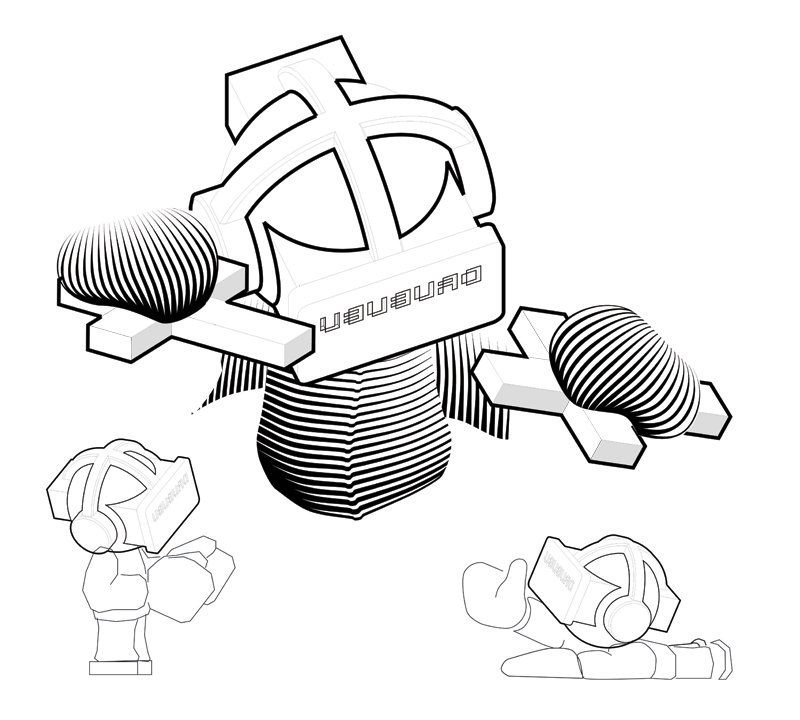
Besides the outlines the virtual reality helmets are generated by a computer program and imported in Adobe Illustrator.
Writing the software to generate the virtual reality helmets took some time, but once done, the virtual reality helmet can be rotated over any angle. The bezier curves are mathematically perfect and have the least possible amount of control points. Drawing the helmet by hand will never be as precise and it would take a lot of time too.
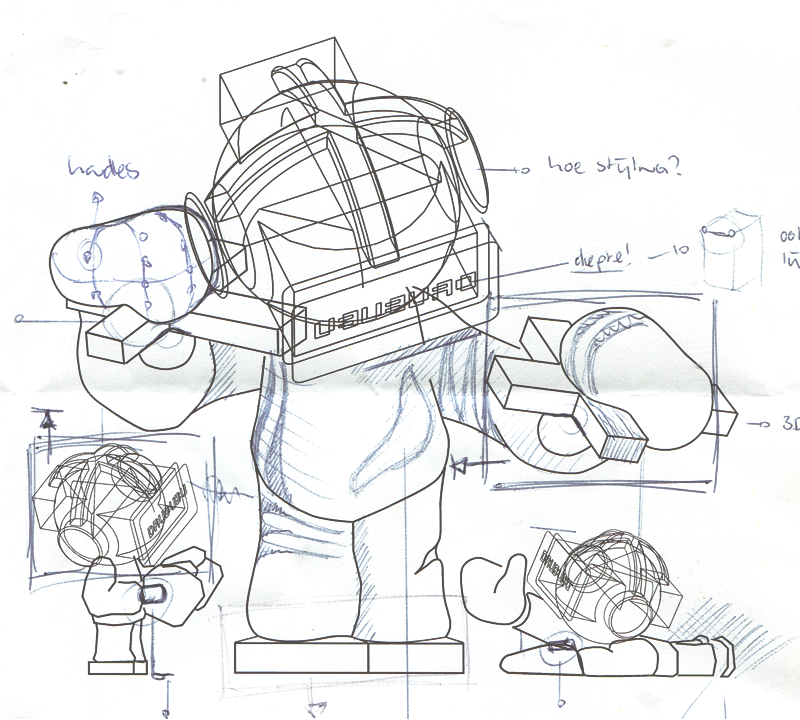
When the outline is completed, the illustration is printed out. On the print I made some notes and doodles to generate some ideas about how to create the desired effect.
This step was the big unknown in this project; I did not have a clear idea how it could be done.
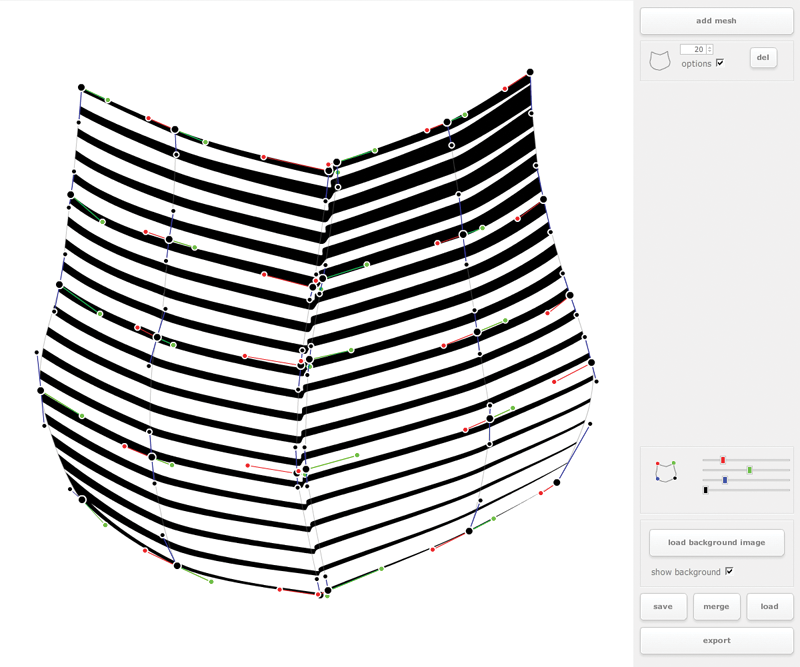
To get the desired effect, I figured out that I needed
so-called bezier patches; a network of interconnected bezier curves.
I wrote a custom program which enabled me to generate the bezier patches.
Just like Adobe Illustrator the control points
and handles can be altered to obtain the desired effect.
The number of lines can also be altered and the
thickness of the lines can be changed.
These options combined resulted in the effect that I wanted to reproduce.
Once the program to generate the bezier patches worked, every part of the illustration could be made.
Every single patch is made stand-alone in the custom program and exported as .svg and imported into Adobe Illustrator.
After some adjustments and tweaking thicknesses and the number of Lines,
the vector illustration slowly merged into the final result.