
Pixel Art Tutorial
This tutorial is a general introduction to pixel art and explains the basic concepts.
Besides the elemental theory you'll find pixel art related information, step-by-step examples
including how-to videos and pages describing the creation of a pixel art illustration from start to finish, including some hints.
Pixel art can be as simple or as complex as you want it to be, and can be made using basic drawing programs. All you need are some drawing skills, a little patience and some knowledge about how to make a nice pixel art illustration.
Pixel art began when the first personal computer was introduced.
Bitmap graphics don't need much computation to be displayed.
Vector graphics have to be calculated or rendered, based on
mathematically described lines and curves, and then converted into a
bitmap graphic, since most output devices use pixels to display images.
The whole process requires a lot of computation power.
Bitmap graphics are the best option when the computation power is not very high (early computers/cell phones). This computationally friendly feature gives pixel art a sort of 'old school'/'retro' look.
Unlike vector graphics, bitmap graphics can't be scaled without loss of quality. If you want to display bitmap graphics - let's say an icon - in different sizes, for different kinds of display devices, you need to make a different version for each size. This is a major disadvantage compared to vector graphics.
You only need one icon as a vector graphics to display it on every possible scale without loss of quality.
Pixel art can be divided into two categories: isometric pixel art and non-isometric pixel art.
Bitmap graphics vs vector graphics
Images that are used by the computer can be roughly divided into two
groups.
The first type of images is the so-called bitmap graphic or
raster graphic image; the second type is the vector
graphic.
The fundamental building blocks of vector graphics are vectors, hence
the name.
A vector is a mathematical description of a line or a curved line. Adobe
Illustrator uses so-called 'Bezier curves' to describe an image. A
vector graphic can be resized without any loss of quality, unlike a bitmap
graphic. More details about vector graphics can be found in the Adobe Illustrator
chapter.
Bitmap graphics describe an image as a collection of colored dots, or
so-called pixels. The pixel is the fundamental building block of
a bitmap graphic.
By resizing a bitmap graphic the amount of pixels increases or
decreases, which results in a loss of quality.
Reducing the size of a bitmap image means less pixels. Based on the original size, the computer has to recalculate - or resample - the original image. Depending on the technique used for the calculation, more or less information is lost. Increasing the size of a bitmap image means more pixels. The computer has to make an assumption, based on the original image, about which colors will be used for the increased amount of pixels.
Resizing your crisp pixel art illustration will result in a blurred image, so be sure to start with the right dimensions.
The image on the left is a vector graphics, the image on the right is a bitmap graphic.
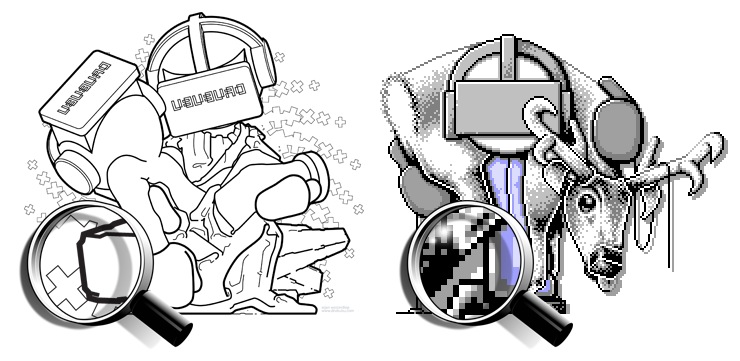
To make it a little bit more complicated, the left vector graphics is displayed as a bitmap graphic.
The original image is an Adobe Illustrator vector graphics, but these kinds of images can't be displayed directly in your browser.
An interesting combination of pixel art, vector illustrations and/or 3D can be found at Metin Seven. Another example of less-uniform pixel art is made by Mark Bern and can be found at Mark Bern or take a look at some pixel art I made Arjan Westerdiep.
Let's forget vector graphics for the moment and focus on bitmap graphics.
Pixel art is, by definition, a bitmap graphic; an image which is
described with pixels.
Isometric Pixel Art
Isometric projection is a projection which is used to represent a three-dimensional object - or objects - in two dimensions. An object is seen from above. The top, left, and right side of the object are visible.
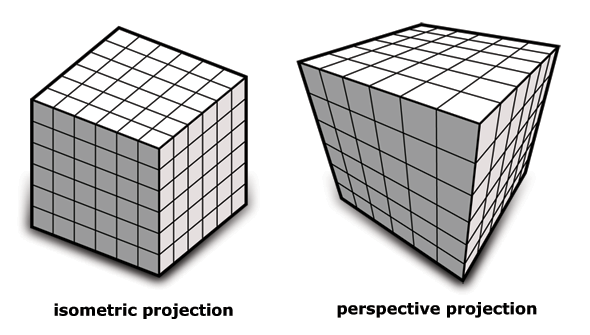
Isometric projection lacks perspective; objects far away from the
spectator have the same size as nearby objects. Isometric projection is
extensively used in older computer games and contemporary pixel art,
because you don't need to resize (read redraw) objects. Or in the case
of computer game perspective distortion doesn't need to be
calculated.
To mimic perspective, overlapping can be used as well as color: the
further away from the spectator, the more the colors loose their
brightness.
The x-axis and z-axis should make an angle of exactly 30 degrees with the horizon. The alignment of pixels on the screen prevents the use of exactly 30 degrees, because this angle would result in an irregular line (left image). Instead of 30 degrees, 26.56 degrees is commonly used in pixel art. Practically speaking, this results in a line that is regular; the line has two pixels per interval. This is also referred to as the 2:1 pixel pattern ratio (right image).
To build a simple object, an isometric cube can be used as fundamental
building block.
The isometric cube can be made once, and then used many times by copying
and pasting.
Think of LEGO® bricks in real life.
Drawing an Isometric Cube
An isometric cube can be drawn very easily

Start with a vertical line (see image 1). Next, draw a line
parallel to the z-axis (see image 2), previously described.
Again, draw a vertical line (see image 3). Next, draw a line
parallel to the z-axis. The left side of the isometric cube appears
(see image 4).
You can repeat the described steps again on the right side, but you
work more efficiently when you copy the left side of the cube and then
flip the selection horizontally and paste it on the right side (see image 5 and
6).
The last step is to draw the top of the isometric cube. Copy the
diagonal lines at the top, flip the selection vertically, and paste it
on top of the cube (see image 8).
The outline of the isometric cube is finished.
You could use the outline (see image 8) as a building block to create isometric
objects, but it's more handy to add some shading first (see image 9).
By using a shaded isometric cube, the shading needs to be done only once
(and then copied many times). The creation of a simple isometric object
is much easier with a shaded isometric cube, since the shap is more clear than just an outline of an isometric cube.
A Simple Isometric Object
The shape of the fundamental building block, an isometric cube, is
important, since not all blocks are useful.
Like the 2:1 pixel pattern, ratio lines can be drawn best with regular
intervals: two adjacent pixels, one pixel up/down, two adjacent pixels,
etc.
The isometric cubes used on the left side of the image can't properly be
stacked vertically; the vertical lines don't fit. By using the isometric
cube on the right side of the image, the regularly shaped lines fit
perfectly.
The above example shows an easy way to create a simple isometric object,
with the help of one shaded isometric cube as the fundamental building
block.
The appearance of the object can be adjusted to get rid of the
individual building blocks (basic version). The outlines inside the
isometric object are carefully removed (simplified version). Next,
highlights and shadow are added (highlight version and shadow version).
By adding highlights and shadow, the shape becomes more spatial, so that
it takes a spectator less energy to perceive the shape.
As the last step, an extra border can be added to separate the object
from the background. There's no real reason to add an extra border,
other than as a personal, subjective preference.
As you can see, it's quite easy to create a simple isometric object.
The object is simple, the complexity and/or scale can be changed, and
the workflow remains the same.
An isometric cube can also be used as a reference for constructing a
more complex, detailed pixel art object.
The teapot and Nintendo GameCube are made with the help of an isometric cube.
Isometric Objects with Curves
Curves are more difficult to draw, but after some practice it can be done.
Like using lines with a regular interval to make isometric pixel art,
curves can be drawn following the same principle. For example, you could
first use a line with three adjacent pixels, followed by two adjacent
pixels and so on.
Everyone can learn the basic rules, but don't follow the rules too
rigidly.
Try to practice and experiment with different angles, colors, choice of
topic, etc.
Non-isometric Pixel Art
Non-isometric pixel art is pixel art that is not isometric.
The IC-Project pixel art illustration is an example of non-isometric pixel art
as is the pixel art illustration of Jesus Christ.
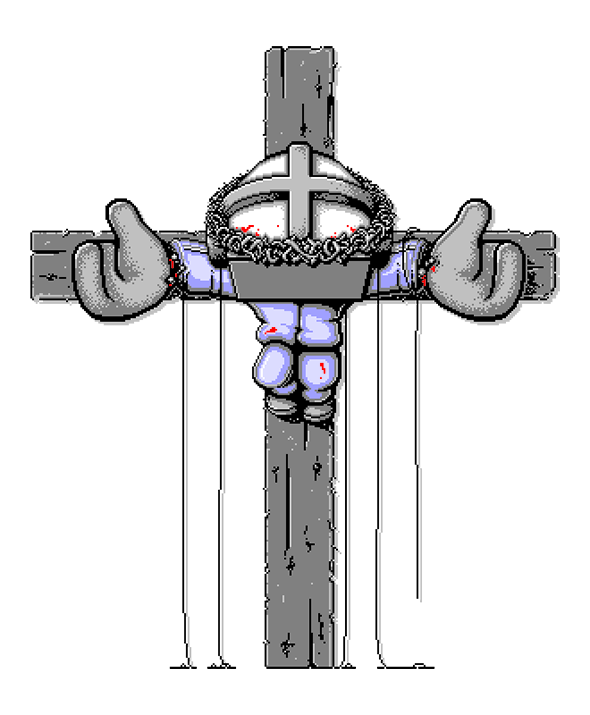
Pixel Art Characters
Pixel art characters are most likely not drawn isometrically.
The pixel art character below this text is an example of non-isometric pixel art.
For more information about pixel art characters see
example one and
example two.
Pixel Art Time-lapse Animation
While creating the pixel art illustration shown in the video below
I've saved a total of 110 different versions. It took me about 10 months
to complete it. I've spent 110 days on the pixel art illustration,
ranging from one hour to an entire working day.
This time-lapse animation gives an impression of the creating process.
Time-consuming
The number of pixels rapidly increases, even with small pixel art illustrations, which makes creating pixel art a time-consuming process.
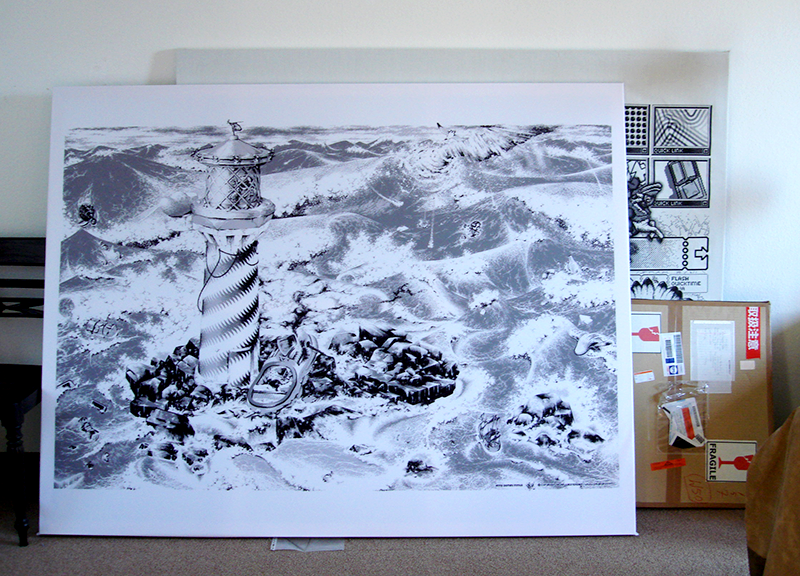
The IC-Project pixel art illustration contains 1.600 pixels horizontally and 1.040
pixels vertically. The total amount of pixels equals 1.664.000 pixels
(1.600 x 1.040 pixels).
Not every pixel is individually drawn; some areas
remain white. On the other hand, not every pixel is drawn right away at
the right position, and some parts of the illustration are drawn a few
times before they look right.
The actual amount of pixels drawn is probably a multiple of these 1.664.000
pixels.
File Formats
To save your pixel art, you can choose various kinds of file types, such as GIF, PNG, or some other file format that is lossless.
| File Format | Number of Colors | Lossless |
|---|---|---|
| PNG | unlimited | |
| JPG | unlimited | |
| GIF | 256 |
1-bit, 8-bits and 24-bits graphics
8-bit (color) graphics are bitmap images with a limited amount of colors.
The color per pixel is described using a so-called
byte. A byte consists of 8 bits. Each
bit is similar to a light switch; it can be on or off, or, more
specifically true or false.
Each pixel is represented by one single byte. Its
value can range from 0 to 255; 256 possible colors. Each value between 0
and 255 represents a specific color.
8-bits (color) graphics are rapidly vanishing; most of today's
graphic hardware uses 24-bits, 32-bits graphics and
sometimes even more bits to describe the color value of a
single pixel.
Besides 8-bits (color) graphics that use a maximum of 256
colors, there are file formats that use graphics of less than
8 bits. MS Paint allows you to save images as 16
color bitmap images; a maximum of 16 colors can be used.
GIF and PNG allow you to use a (very) limited palette.
If your artwork has just 2 colors, say black and white, saving your
artwork as a 1-bit graphic is perfectly fine.
| Number of Bits | Number of Colors | File Formats |
|---|---|---|
| 1-bit | 2 | GIF, PNG |
| 2-bits | 4 | GIF, PNG |
| 3-bits | 8 | GIF, PNG |
| 4-bits | 16 | GIF, PNG, BMP |
| 5-bits | 32 | GIF, PNG |
| 6-bits | 64 | GIF, PNG |
| 7-bits | 128 | GIF, PNG |
| 8-bits | 256 | GIF, PNG, BMP |
| 24-bits | 16.777.216 | PNG, JPG, BMP |
File formats such as JPG will compress your image
by removing small details. In this way, your original image will also
lose details. The amount of details lost depends on the degree of
compression.
Due to the loss of quality, JPG is not a good option for saving your
pixel art illustrations.
Instead of JPG, use a file format like GIF or PNG if you want to display your work on the Internet.
If you save a 24-bits image to an 8-bits image,
colors may lose quality and vividness.
An 8-bits image supports a maximum of 256 colors. A 256 color
palette is calculated and each color is converted into one of the colors
of the palette. The conversion of colors entails a quality loss, which
is more or less visible depending on the characteristics of the
image.
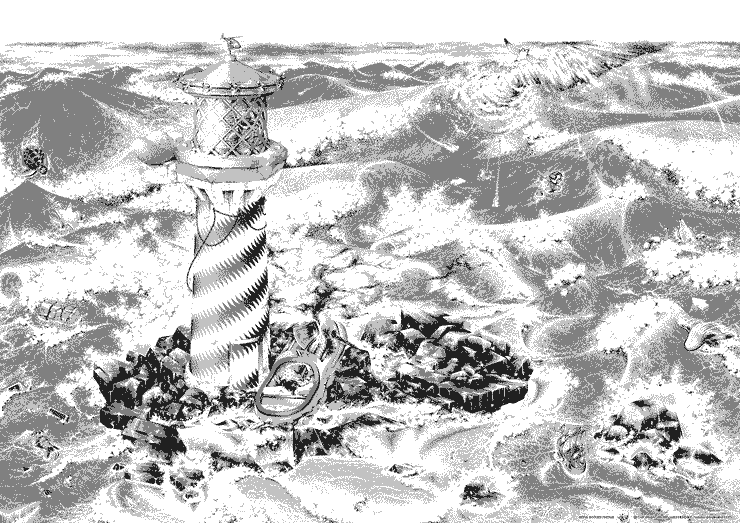
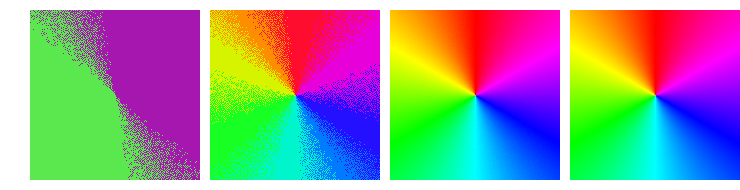
The loss of quality is especially visible when a 24-bits image
is saved as a 1-bits image (see left image);
instead of 16,777,216 possible colors (24-bits image) a pixel
can have just 2 possible colors (1-bit image).
The Fun of Pixel Art
You've just read that creating pixel art is a very time-consuming
process, so why do it at all?
Pixel art allows you to work on a sort of molecular level of an image.
You have to puzzle as to how to place a pixel at the right position; one
pixel to the left or one pixel to right, or a different color of the
pixel, can make a difference.
Basically, creating things is fun.
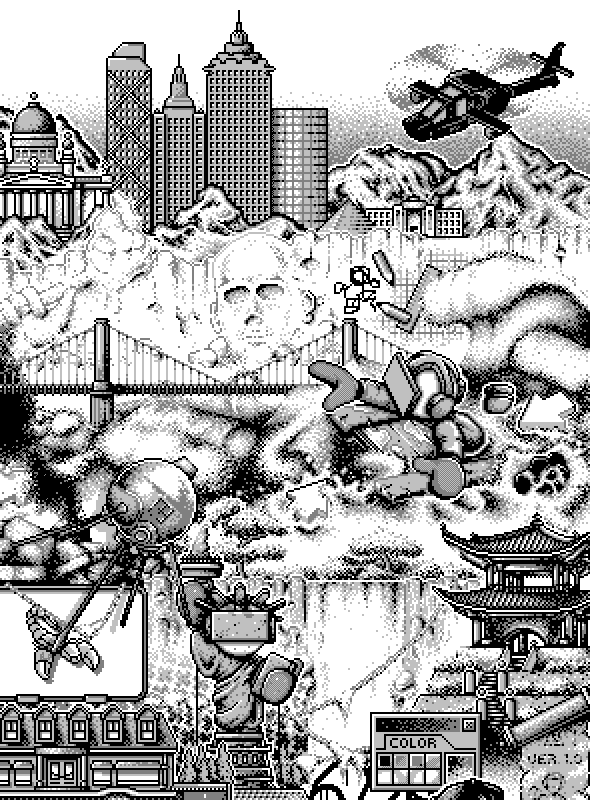
You could start the creation process with some flat gray areas
(see top left image). You may have serious doubts as to whether it will
ever look right in the end... You start working on specific areas and
give these areas more detail (see top right image). While working on the
illustration, you have to find out which places need adjustments, and
which places already look right.
Slowly you discover that things begin to look more and more like the
image or idea you had in mind (see bottom left image); flat areas become
three-dimensional, details start to emerge, and previously separated
parts start to blend together.
While working in a very concentrated way, you may experience a very
pleasant mental state of mind, or 'flow'.
Finally - after many hours - you see something that is even better than
you thought or hoped it would look (see bottom right image).